Plank Drill Safety
After Coach Phil’s excellent video from the other day about how you can use plank drills to test your core strength and improve your drive-through, I decided it was important to break down the plank drill a little bit for those of you who have not done it before.
Plank Drill: things to keep in mind
Temma, our plank drill demonstrator, makes it look easy. Don’t be discouraged if you can’t do this drill right away; it is NOT easy. Temma is one of our most advanced high school pitchers and she works out with Joe in person. If you’re not quite up to the plank drill yet, that’s OK. What you need to keep in mind is if you become strong enough to do the plank drill well, you’re well on your way to becoming strong enough to pitch your best. If you’re not that strong yet, that’s OK, but you know what you need to work toward.
Always do the plank drill with supervision to ensure that your body positions match Temma’s. If you do this drill correctly, there is little risk of injury. However, if you challenge yourself too soon and try to do this drill over and over again with dangerous mechanics, you may be doing yourself more harm than good. The same goes for pitching in general!
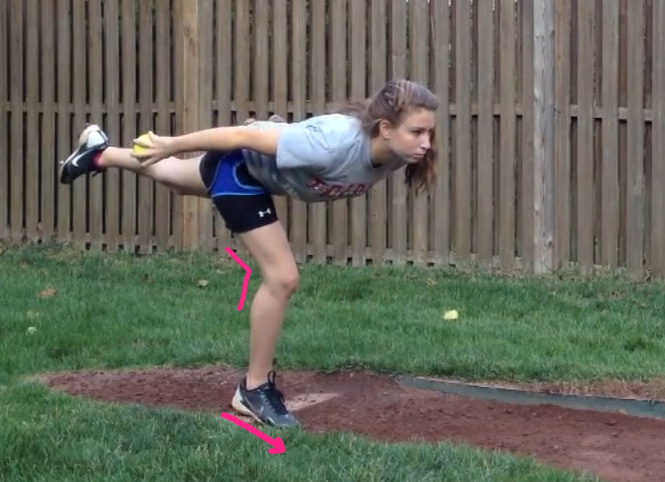
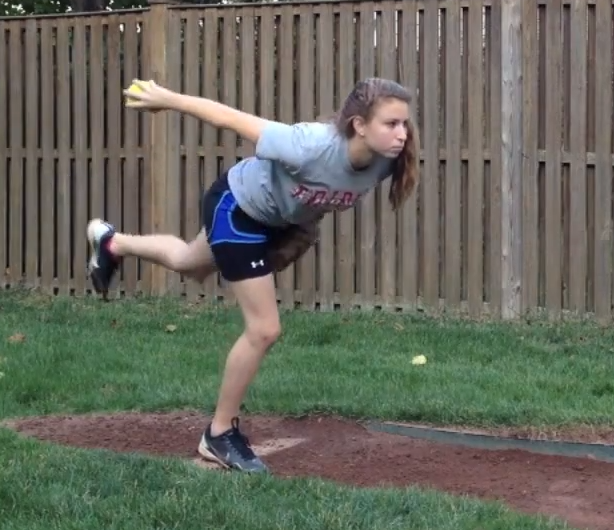
Let’s look at Temma’s body position during the plank drill:

- Temma’s back is flat, not arched, and it’s relaxed.
- Her shoulders and hips are parallel to the ground and square to the catcher
- Her toes and knee are pointed forward
- Her arms are even
- Her right leg is supporting her, and it is slightly bent; not locked
Even ignoring the rest of the drill, it takes a certain level of strength just to balance yourself in this position. If you can’t do this—i.e., you can’t keep your balance, your knee collapses inward, you feel tension in your back, etc—you may want to work on your overall core strength, leg strength, and hip stability with simpler exercises before attempting the plank drill again.
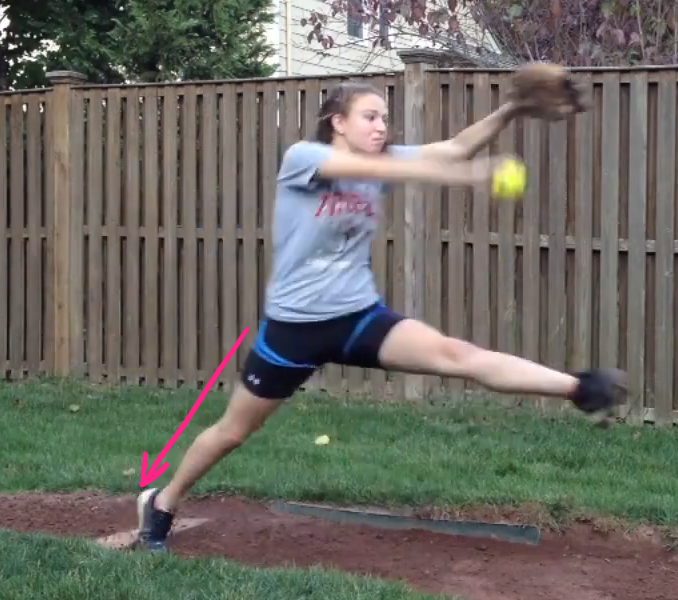
Coming out of this position with good mechanics is critically important:

Everything remains square to the catcher—i.e., Temma’s hips and upper body do not turn to the side—and she uses her legs to start her forward momentum.

Temma gets into K position by dynamically extending her push leg very quickly. You’ve probably heard that you should lift heavy objects “with your legs, not your back.” The same concept applies to this drill. You MUST be able to power the drill with the strength of your legs, leaving your back relaxed and as disengaged as possible.
For your safety, please ensure that you can perform the drill in this way before attempting too many reps. If you’re not there yet, don’t worry! Check out Joe’s posts to find out how you can get started with strength training.